Page 1 of 1
Lets make something (not work related)
Posted: Thu Mar 14, 2013 9:53 am
by NidalRobb
Thought will be nice to be able to make at least one item every fortnight! Non work or commercial related of course! and be able to see what others are making and share ideas/photos or issues.
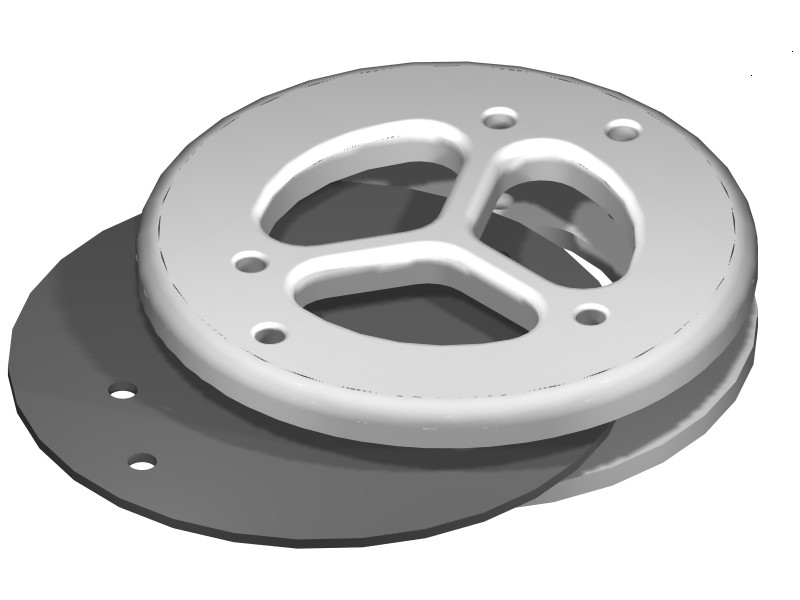
The acrylic that I cut yesterday was for a friend that needed a bearing holder for a rod.
I did the end table, which came out great even though i did not spend any time really on finishing or painting (just hand sprayed it)

Posted: Sun Mar 17, 2013 5:20 pm
by NidalRobb
Inspired by this laser cut puzzle box
http://www.instructables.com/id/maze-pu ... /?ALLSTEPS
I redesigned it so it can use the unique feature that our CNC router got over laser; pocketing.
The final piece will be cut in Acrylic but i am doing it in MDF to test and fix any issues. The top layer will be pocketed reversed so it hides the maze, but once the box is opened, the maze will be visible as Acrylic is clear.
Also, as the DXF files being generated by the site is not working anymore and includes many errors; hence the redesign from scratch.
The first layer (base) is 15mm, pocketed to hold the lock/button mechanism. Then a cover layer for that, pocketed underside so the button/parts are free to move.
Then the third layer is where the maze/ball is. Then a clear cover for that, then the top layer. Total 5 layers rather than 8. Top layer is similar to the base layer (15mm); while the three middle layers are 5mm each.
Additionally; it will be screw design and no glue.
I only had time today to cut the MDF sample; i need to redesign the hinges part, probably use a bolt rather than hide it into the first layer. Everything else is working perfectly. Probably will play with the files a little; do another MDF run then do the Acrylic run later on in the week.

Posted: Wed Mar 20, 2013 4:46 pm
by NidalRobb
Plans to leave to Seattle got delayed (state side) so i got few days off!

Leaving to US on the weekend now.
So been busy "playing" with the CNC.
Today, i made a box and a puzzle.
The box is a Vectric's free project found here:
http://www.vectric.com/cool-stuff/proje ... e-box.html
Not going to stain it yet; maybe later. It was done in Pine. Didn't bother with using more than one V-bit size according to project details; i just used a single 1/4" 60 deg. V-bit for everything and a 1/8" End mill for cutting/profiling. Was fast too. Man! this box will come out really nice with hardwood! I need to get my hand on some nice hardwood. I only have scrap Pine now!


Then i did one of Bruce's home made puzzles.
http://homepage.ntlworld.com/bruce.vine ... 20plan.pdf
Of course his puzzles are for hand wood working, but almost all of them can be cut on CNC. Bruce got some really nice plans.


Posted: Mon Apr 01, 2013 11:52 pm
by wwheeler
I've been slowly working on creating a set of CNC files for cutting most of the mail truck bank from Rockler. Funny enough I'm finding some mistakes in the design. Mostly it's "use this size arc and have this much space between the top edge and the points where the arc finishes. (the windshield spacer) The arc size they define can't meet both the outside requirements. and still be that radius.
But it's still a nice challenge.
Posted: Tue Apr 02, 2013 9:56 am
by NidalRobb
wwheeler wrote:I've been slowly working on creating a set of CNC files for cutting most of the mail truck bank from Rockler. Funny enough I'm finding some mistakes in the design. Mostly it's "use this size arc and have this much space between the top edge and the points where the arc finishes. (the windshield spacer) The arc size they define can't meet both the outside requirements. and still be that radius.
But it's still a nice challenge.
I bet it is. Is the error more than 1/16"?
Been in the US for a while now. Kinda miss working on the CNC. Visited Ahren from CRP, kinda made my cnc-sickness even worse

Posted: Tue Apr 02, 2013 8:55 pm
by wwheeler
yeah more than a 16th
Posted: Wed Apr 03, 2013 6:10 pm
by NidalRobb
While looking at using plans meant to be cut by hand, i did notice some plans do leave an extra bit of material so at the end a flush trim bit can be used on a router for a perfect finish, maybe its not the case in the error you found, but its worth noting
Posted: Wed Apr 03, 2013 6:17 pm
by wwheeler
well, yeah, there is a built in fudge factor when dealing with hand cut plans vs machine cut.
Posted: Wed Apr 03, 2013 11:00 pm
by sandra
My Project was born out of serious need and is still in the design stage.
One of my hobbies is Astronomy. I have allot tied up in my Telescope and Mount. Last summer my mount was the victum of a Mouse attack, a familiy setup housekeeping and proceeded to chew up wiring, nest material, food and dropping were all over the internals of the mount.
So I took some measurements and am designing a custom cover for the the point the entered the mount (which is by design to allow cables to route through the mount)
I want to cap that and include a rubber insert to allow the cables to come through a very tight fitting.
This is my initial design of the cap in 3 parts, top to bottom
the outer cap, the rubber insert and the inner cap
as it's getting warmer I need to get this done before they mice come back
And BTW, they did $3K in damages to the mount. mostly labor cost
Posted: Wed Apr 03, 2013 11:47 pm
by wwheeler
With it getting warmer I would think the mice would be happy outside and only come in when the weather turns bad and colder.
Remember you probably still have to deal with the connectors on the end of the cables. So some concessions will have to be made with the gasket. Hmm here's something to think about. How about using a notched insert between the cables and the outer or inner surface of what you have now.
Then you will have enough room for the plugs to run through and you can then sort the cables around the insert and place it in the rings.
Just an idea.
Posted: Thu Apr 04, 2013 12:05 am
by sandra
What happens is as it gets colder the mice go to find warmer places like a house the observatory is not heated or cooled. it's always air temperature for the optics. Now the ferrell cats take care of that for us house for us but my observatory though is farther away( about 250ft from the house) when it warms up they come out to start breeding and looking for a good place to do so. the inside of the mount makes a natural hole for them that's dark and roomy. hence my problem. i placed one of the electronic pest devices our there and stuff the openings to make it harder to get in to the mount for now.
I was planing to place star shape cuts into the center piece to allow cable through but also keep it pretty tight.
Posted: Thu Apr 04, 2013 1:42 pm
by NidalRobb
Nice project. Thanx for sharing.
What software you planning to use to cut it? Cut 3D? Aspire? As those will be perfect to cut something like this.
Also, what the material you are thinking to use? Maybe HDPE? or Alloys?
Posted: Thu Apr 04, 2013 7:12 pm
by baysale976
In my experience, mice can chew through rubber. But they hate steel wool. And the smell of mothballs.
Posted: Thu Apr 04, 2013 8:17 pm
by sandra
I have MeshCAM for 3D work. This will be the first time using though.
I designed it is TurboCAD Pro V20. The Upper Part would be done Done with MeshCAM while the rest would be Cut2D.
I actually plan on Aluminum for it and then will Powder Coat the parts black to match the Mount itself (though it is anodized not powder coated)
The steel wool I did not know about.
I might stuff some in there for now as an extra layer of protection until this is done.
Posted: Wed Apr 10, 2013 12:25 am
by NidalRobb
Its time for the Fantasy Mansion from MakeCNC....
I used 3.6mm Plywood with 2mm 4 Flutes end mill. Setting where 100 ipm at single pass (3.85mm cut).
It came out really nice; some parts the plywood has small chipping but i guess i should have used a down-cut for that, still the result is impressive.
This size came out to be 28"x28" for the base with 25" Height. They provide the CAD drawing in one huge file which means you need to do some work and group the parts to cut into smaller files per your CNC cutting size. for 3.6mm; all parts fit into 2 4x8 sheets (4 pcs 4x4).
Here are some pics... enjoy...


Posted: Wed Apr 10, 2013 8:33 pm
by sandra
Oh now she is beautiful
and the house is pretty also
Posted: Wed Apr 10, 2013 8:47 pm
by NidalRobb
Thanx Sandra.
Posted: Thu Apr 11, 2013 2:06 pm
by Tom Walter
Nice work!
My youngest just turned 18 (!), but I suspect she would still love a doll house like that!
Thanks for posting up.
Posted: Sun Apr 14, 2013 2:38 pm
by NidalRobb
Wanted to give a gift to a friend who is a citizen of this country to display at his office.
I got a Time only clock with some hands from clockworks.com and did a 3D piece on the country's map. The 3D are done with Ball Nose, the Dials are V-carved. Once first coat is dry (last photo); I still need to do another light sanding and then a second coat.
I still dont have much experience with 3D but i think it came out ok, this piece is around 25" (W) x 19" (H), the 3D roughing/finishing took around 0.55" leaving the plane at 0.20" with the 3D pieces still almost 3/4" raised. It took around 3 hours for everything; I used 1/8" for 3D finishing; while normally 1/16" is used but it would need around 5 hours and did not have that time and considering the 3D is large size hence 1/8" Ball nose is ok for this size.
Here are some pics…..enjoy..


Posted: Mon Apr 15, 2013 7:23 am
by sandra
that's realy neat and looks pretty cool
Posted: Mon Apr 15, 2013 9:49 am
by NidalRobb
I do need to pick up some tips here and there regarding doing 3D. I've been wanting to make this wall cloth hanger for a while now, here is the final simulation on Aspire for the project.

But it needs 9 hours to complete!! its 28" x 3.5" and the entire piece is 0.5" 3D thick. I do know that small bit 1/8" removing a huge area of wood takes a lot of times, but i think i may be too conservative in regards to feed rate and such! I just can't sit 9 hours and of course wont leave the CNC running without any control!
I just got an IP camera that i am going to mount on the CNC, i can view (with night IR vision) the work piece being cut. Now i can see it on my iPhone or iPad.
So far i going to install it on one of the Aluminum block riser on the Y beam. It fits there and already tested, I just need to run a power cable and an RJ45 network cable to connect the camera to my network then i am all set to view the work.
The camera does have also alarm I/O which i can modify. i am now designing a small circuit which i can attach to this Alarm I/O so i can trigger Normal Pause and also E-Stop, if i got these things working then i can stay inside the house watching it on the big screen or on the iPad!
Posted: Mon Apr 15, 2013 3:10 pm
by dan
Cool! Both the piece you'd like to cut and your electronics upgrades.
Posted: Fri May 03, 2013 3:30 pm
by NidalRobb
Posted: Fri May 03, 2013 5:19 pm
by wwheeler
NidalRobb, Have you worked the hanger board using a clearing cut first with a large bit to get most of the spoilage out of the way? That may cut down the cut time significantly.
Posted: Fri May 03, 2013 11:18 pm
by NidalRobb
If you mean roughing/finishing strategies; this is how Aspire does it. You run a Roughing job where a larger bit takes some of the material first then you run a Finishing job that does the details.
Posted: Fri May 03, 2013 11:20 pm
by wwheeler
Yeah I knkow I have Vcarve and cut 2d. What I meant was Really up the bit size if you can.
Posted: Fri May 03, 2013 11:29 pm
by NidalRobb
Really? You mean for the 3D plate?
The 3D plate took around 50 min each side, i think thats pretty good and probably I won't save much time by using a larger roughing bit. I used 5/16 for roughing on the plate but will for sure try a 1/2" bit on the simulator to see the expected cutting time. I have already tuned Aspire to report the time within two seconds difference.
Posted: Sat May 04, 2013 3:00 am
by wwheeler
I was actually referring to the Cloth Hanger posted earlier. That run that will take 9 hours.
Posted: Sat May 04, 2013 6:32 am
by NidalRobb
Oh, I see. My bad. I just noticed you mentioned hanger. Yeah, i tried many simulations for that piece. The file and wood are ready to cut, but i dont have the time now. I think because its full 3D so there are details everywhere, the roughing will only take 0.3" while the rest needs to be done with the 1/16" or 1/8" bit. So far the best timing is 8 hrs 22 min. If i get aggressive with the feed rate/pass depth, i can cut that to half! Will give it a try soon.
Posted: Sat Jul 13, 2013 5:01 pm
by jkube
This thread seems to have died a little. Here's a glass lithophane I made the other day. It took me four tries but I've got the general process down.

Posted: Sat Jul 13, 2013 5:04 pm
by dan
I had to look up 'lithophane'. That's really cool! How do you do it?
Posted: Wed Mar 19, 2014 3:29 pm
by jkube
Here's a video of a graphite mold for casting glass being milled
http://youtu.be/534ZNaK9eE8
Posted: Wed Mar 19, 2014 4:21 pm
by msimpson
Very cool. I'm gunna put that vid in the KRMx02's in the Wild page, and my milling examples page.
Posted: Wed Mar 19, 2014 6:27 pm
by msimpson
What kind of bit do you use for graphite? Feeds and speeds?
Is it dusty?
Posted: Wed Mar 19, 2014 11:16 pm
by jkube
Carbide. It supposedly wears tools pretty fast but I haven't done enough to notice. I don't remember the speed and feed off hand. Sub 100ipm I'd imagine.
Graphite will get everywhere if you don't have a good dust collection system. I worked for a guy who just had an enclosure that had to be cleaned out every once and awhile. I wouldn't recommend that route. It will get on your hands and it will get on the dust shoe brushes that are wiping back and forth over the piece. Not too terrible though if you know what you're getting into.
Posted: Thu Mar 20, 2014 12:42 am
by msimpson
Did the AirExchanger keep the dust from escaping? If not have you thought about a modified shoe for the longer bit you are using?
Posted: Thu Mar 20, 2014 5:18 pm
by jkube
The air exchanger works like a charm. Just a word of caution.
Re: Lets make something (not work related)
Posted: Wed Sep 24, 2014 6:37 pm
by specsix
Just sharing my iron man I made with the KRMx02 with rotary

Re: Lets make something (not work related)
Posted: Wed Sep 24, 2014 10:42 pm
by msimpson
Awesome

!
Re: Lets make something (not work related)
Posted: Sun Nov 30, 2014 2:58 am
by specsix
Another project I did for the family. Always wanted a medieval fireplace. The hardest part was working with warped mahogany. I ended up clamping the wood down for a week to straighten it out and then planed it flat before cutting.
https://dl.dropboxusercontent.com/u/619 ... .53.00.jpg
https://dl.dropboxusercontent.com/u/619 ... .53.09.jpg
https://dl.dropboxusercontent.com/u/619 ... .54.23.jpg
https://dl.dropboxusercontent.com/u/619 ... .55.24.jpg


